In today's digitally connected world, sharing has taken on a new dimension, including audio sharing. Apple’s introduction of the audio-sharing feature further revolutionizes how people listen to their favorite tunes or watch videos together. This feature allows an iOS device to stream audio to two pairs of AirPods or Beats headphones simultaneously. This guide will walk you through the steps needed to connect two AirPods to one iPhone or iPad seamlessly.
1. Checking the Prerequisites
Before delving into the process of connecting two AirPods to a single iOS device, there are certain prerequisites you need to check. Not all Apple devices support audio sharing. This feature requires an iPhone 8 or later, iPod touch (7th generation or later), iPad Pro 12.9-inch (2nd generation or later), iPad Pro 11-inch, iPad Pro 10.5-inch, iPad (5th generation or later), or iPad Air (3rd generation). Also, the device must be running on iOS 13 or later or iPadOS 13 or later. Ensure that your headphones are compatible as well.
2. Firing Up Your Bluetooth
Once you've confirmed that your devices meet the requirements, the first actionable step is enabling your Bluetooth. Navigate to the 'Settings' app on your iOS device and tap the Bluetooth option to toggle it on. Make sure the device you are pairing your AirPods with is well within Bluetooth's range.
3. Connecting the First Pair of AirPods
The third step involves connecting your first pair of AirPods to your iPhone or iPad. Open the charging case, hold it close to your iOS device, and wait for a pop-up on your screen. Tap 'Connect' on the prompt and hold the button behind your AirPods case until the front LED blinks white. This indicates that your AirPods are now connected to your device.
4. Engaging Audio Sharing
Now that your first set of AirPods is connected to your iOS device, it’s time to engage the audio-sharing feature to connect the second pair. While playing audio, go to the Control Center by swiping down from the top right of your screen. Long press on the audio card, hit the AirPlay button, and then 'Share Audio.'
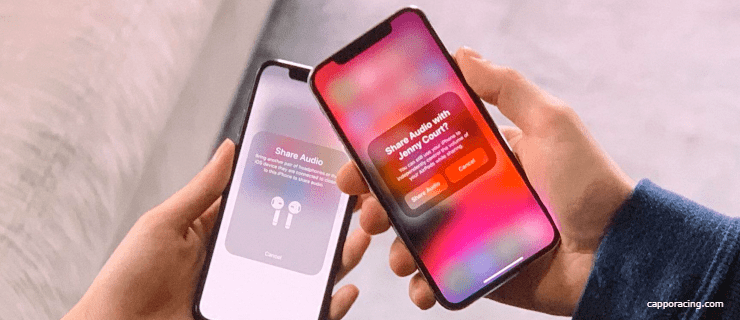
5. Pairing the Second Set of AirPods
With audio sharing engaged, you are now ready to connect the second set of AirPods. Again, hold the second AirPods case near your device, open it, and press the button at the back until the LED light flashes white. Accept the 'Temporary Audio Sharing' prompt that appears on your device, and your second pair of AirPods will be connected.
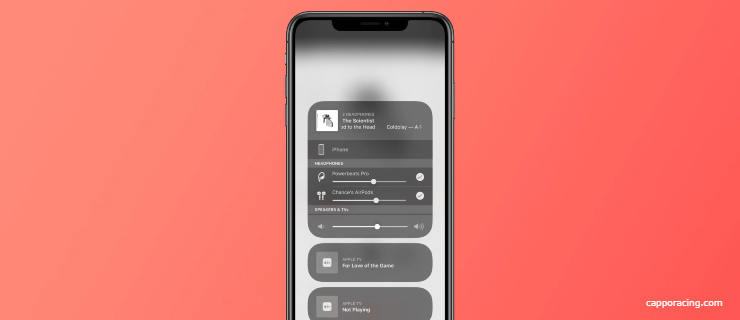
6. Confirming and Adjusting the Connections
To ensure that the two pairs of AirPods are properly connected to your iOS device, return to the audio card in the control center. A dual headphone icon should be shown if the pairing was successful. By tapping on each headphone icon, you can adjust the volume independently for each set of AirPods.
7. Ending the Shared Audio Session
After sharing audio, you may wish to end the sharing session. This process is straightforward. Just go back to the audio card in the control center, find the headphone whose connection you want to terminate, and tap the 'Check' icon next to it. This will effectively disconnect the selected AirPods from your device.
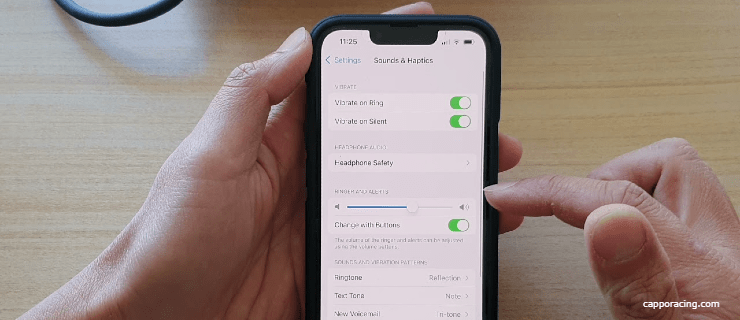
8. Adjusting the Volume and Noise Control Settings
When you and a friend are jointly enjoying an audio experience through AirPods or Beats headphones, you can set varying volume levels for both units. Open Controls on your device, then tap and hold the volume control to adjust the volume using the sliders. If you are using compatible headphones like AirPods Pro or AirPods Max, you can alter the noise control modes. Tap one of the noise control buttons at the bottom of the screen, then choose your preferred option, whether it's Noise Reduction or Transparency mode.
The Control Point’s volume screen displays the volume levels for both pairs of AirPods earbuds. An icon indicating Transparency mode (Noise Control/Transparency) appears below the volume indicator on the left, while the Noise Control/Noise Reduction icon below the volume indicator on the right signals that the Noise Reduction mode is active.
8. Terminating the Audio Output
Finally, if you need to end the shared audio output, simply tap the 'Playback Location' button on the Performances screen, on the Lock screen, or in Control Panel on your device. Proceed to tap your friend's headphones' name to disconnect them from your device. And voila! You've successfully ended the audio-sharing session.
Listening to the audio together with a friend using compatible AirPods or Beats headphones is a joy that vastly enhances the experience using this Apple-provided feature. By following these easy steps, you can share those memorable tracks and moments, adjust the volume for each user, and manipulate the noise control settings to best suit your surroundings. So sit back, relax, and enjoy your shared listening event!


Leave a comment
Your comment is awaiting moderation. We save your draft here
0 Comments